Title here
Summary here

TLDR – What this guide covers
Decoration, or deco, is the visuals you see when viewing a level. The deco made in Geometry Dash can range from restrained and simple, to flashy and complex.
However, learning how to decorate can be a very difficult process. This guide introduce you to that process, and give you the fundamental knowledge you need to decorate well.
As mentioned before, deco is the visuals you see when viewing a level. However, there are countless variations to deco, so it helps to know what types of deco exist.
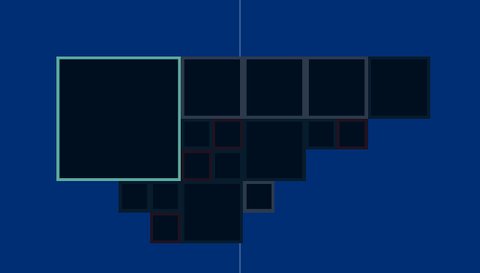
This image has all the common elements of decoration in it. You don’t need every element for every level, but it’s useful to recognize them when you see them.
The building with the pink pad and lights on it is a Block Design. This is decoration that signifies platforms you can touch as part of gameplay. The point of block designs is to make it clear where the level’s gameplay is.
The buildings to the left and behind the blocks are part of the Background. These fill up space behind the blocks so the decoration can look more interesting.
The rain and particles in the air is a form of Air Deco. While backgrounds fill space behind blocks and foregrounds fill space in front of them, air deco fills space on the same layer as blocks.
When watching a video of this level, there are many parts of the deco that move, change shape, or change color. These are Animations, which make levels feel alive instead of static.
Some levels use animations with optical illusions to make neat decorations that wouldn’t be possible otherwise. These are Visual Effects, and they often create crazy visuals because of their nature.
As mentioned before, you don’t need every deco element in your levels. In fact, some creators choose to intentionally add or remove these elements as needed.
A style is simply an extension of that. A decoration style is how you make a piece of deco. These include aspects like how detailed your deco is, if you use certain shapes, and so on.
You’ll learn plenty about styles in future guides. For now, it helps to recognize some of the most basic genres of level you’ll see:
Classic Design levels use the game’s objects as-is. They typically don’t create custom assets from the game’s objects, but try to use the existing objects in smart ways.
Custom Art levels use the game’s objects to create new, custom assets. This leads to more varied levels, but is harder to do.
There are many subgenres in the game as well, such as Modern, Glow, and Effect levels. However, this is purely an aesthetic choice, so don’t get too worried about choosing a style yet.
The upcoming guides will ensure you have the skills necessary to decorate in any style you want.
Since decoration is so complex, it helps to remain organized and comfortable when making it. Here are some of the important ways that creators stay organized when decorating.
Editor layers organize how you select objects. You have lots of freedom with how you organize objects using these, but here are my recommendations.
Here is an example video from And Ever by Galofuf, showing how he organized his objects into layers.
Z Layers and Z Order control what objects show on top of others. This is explained more in this guide.
As before, you have a lot of freedom with how you organize objects, but experienced creators typically follow some of these guidelines.
Although Z Order and Z Layer are quite similar, they have many differences too. Z Order is a more precise version of Z Layer, where you can adjust the layering of objects even if they’re on the same Z Layer. Think about it Like this: I have several objects in the background of my level, and my background is on Z Layer B5. By using Z Order, I can layer the objects in the background even when they’re on the same Z Layer. This helps you organize your decoration between the base and the details, on just one Z Layer, especially if you have a lot of things in your level going on.
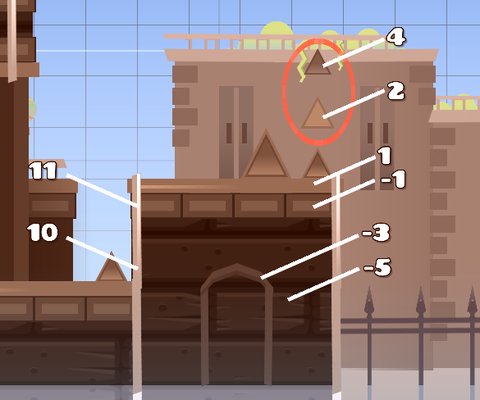
Editor and Z layers are best seen in the actual editor, so I strongly recommend opening up actual levels to see how other creators use these. In addition, here is another example from Galofuf’s work where the objects are on T1. Each number shows the Z Order of the object it points to.
Color Channels are another resource you should organize. These are explained in the Using Channels guide, but as before, creators often follow certain guidelines when using them.
You’ll likely use plenty of triggers when decorating. As such, it’s important to know how to organize them. Here are some tips I follow:
The final thing you should know how to use are editor settings. Many editor settings can help you to create faster, or enable creating at all.
These settings can be accessed on the main editor screen by pressing the “Esc” button or by clicking the
 pause button in the top right corner:
These settings can be found by clicking the
 in the top right of the pause menu of the editor:
After all the previous steps, the last is to figure out how to make the deco itself. There are many caveats and additional details you’ll learn in future guides, but the general workflow is as follows.
Ideas are the first step of decorating. Without knowing what you want to make, it’s hard to decide how you’ll make it.
If you’re unfamiliar, you should read the guide on making ideas.
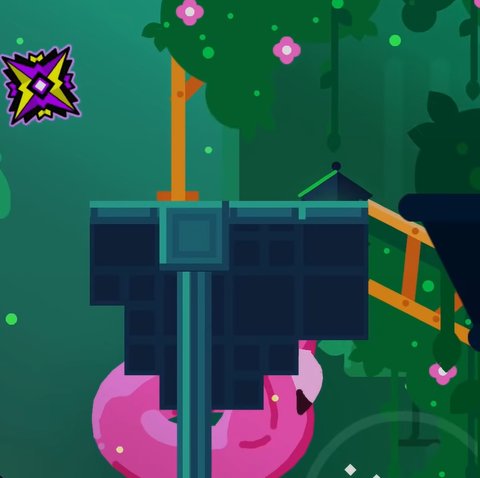
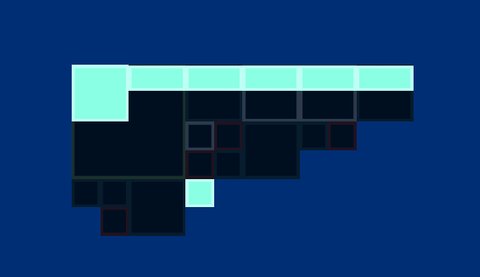
In this example, my idea was to recreate a block from the level Azimuth by Knots, and put my own spin on it.
It’s very difficult to make an idea completely from scratch. You may have an idea in your head, but keeping that image while trying to decorate can be very difficult.
That’s why references and inspiration are so helpful. Inspiration helps you think of ideas you could include in your deco, while references are images you rely on when learning how to make a detail.
It helps to read the guide on inspiration if you’re unfamiliar. Reference images will be covered in a later guide.
In this example, my inspiration source and reference was this screenshot from the level Azimuth.
It’s tempting to start working on details first, but that is risky. It helps to create the basic shapes and colors for your deco first. That way, your details will have a good foundation to stand on.
Think of this like making a house. You can’t get started on buying furniture before the foundations and structure of the house are set up. Otherwise, your furniture might not fit in the rooms – or worse yet, the house might collapse completely.
Making basic shapes is covered in a later guide – in fact, there are two of them. For now, I used squares as my basic shapes, and used a few shades of blue for the basic colors.

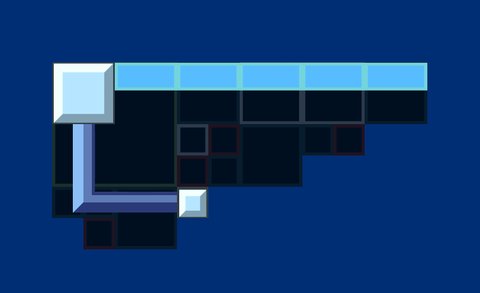
With your foundation set up, it’s finally time to add details. Details are just additional features of your deco, like new shapes, colors, and textures. They usually fit inside the foundation, meaning you’ll have plenty of small, intricate shapes to manage.
Details will be covered more in a later guide. For now, try not to go overboard; adding too many details to a small place can make it messy.
Here, I included some bright sections as details. They’re smaller than the full block, but that helps make it more intricate.
It helps a lot to get other people’s input when making things. Other creators will think of details and ideas you didn’t think of, and show you techniques that you may not know.
While it can feel embarassing to show your deco for the first time, note that everyone goes through this, and don’t feel bad about making something you aren’t fully proud of.
After all, this step involves going back to the beginning. Use the ideas, feedback, and inspiration others give to come up with new shapes and details for your deco. This way, you can refine your work and make a product you’re truly proud of.
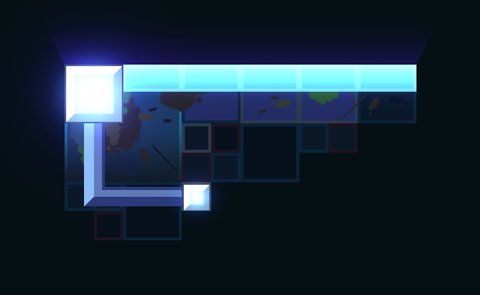
Here, I added additional detail to the sections that I already made.
I then refined the details more by including some gradients, which gives them some more variety.

Finally, I added some details to the rest of the block; that way I could make something that felt more like my own deco instead of just copying Azimuth.
Video:
 ,
NotAModerator and
poryii.
,
NotAModerator and
poryii.