Title here
Summary here
Incomplete guide
This guide is missing the following:
TLDR - What this guide covers
Note
This guide contains interactive images; you can click or hover over elements to learn more about them.
When making minigames, one of the important aspects to get right is controls, as they are the way that the player interacts with your level, making them complicated or confusing would lead to an unsatisfying experience despite how good the gameplay is. However, doing so with the limited number of inputs that Geometry Dash gives can be quite challenging.
This guide discusses how you can use different button combinations to create more actions all while maintaining a manageable control layout.
For mobile, taping on the screen anywhere (except for the pause and practice buttons) will count as a jump. The Left/Right buttons are also visible on screen in platformer mode when on mobile.
The 8 keys are spread across the 2 players, with P1 having more options for jumping. In mobile the key is also split into 2, with the left side controlling P1 and the right side controlling P2 The buttons are also visible on screen in platformer mode when on mobile.
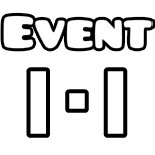
Geometry Dash provides various methods to detect when the player presses a button, this section lists them in order from most direct (detects when a key is pressed) to least direct (detects the player changing position, which is caused by them pressing a button)
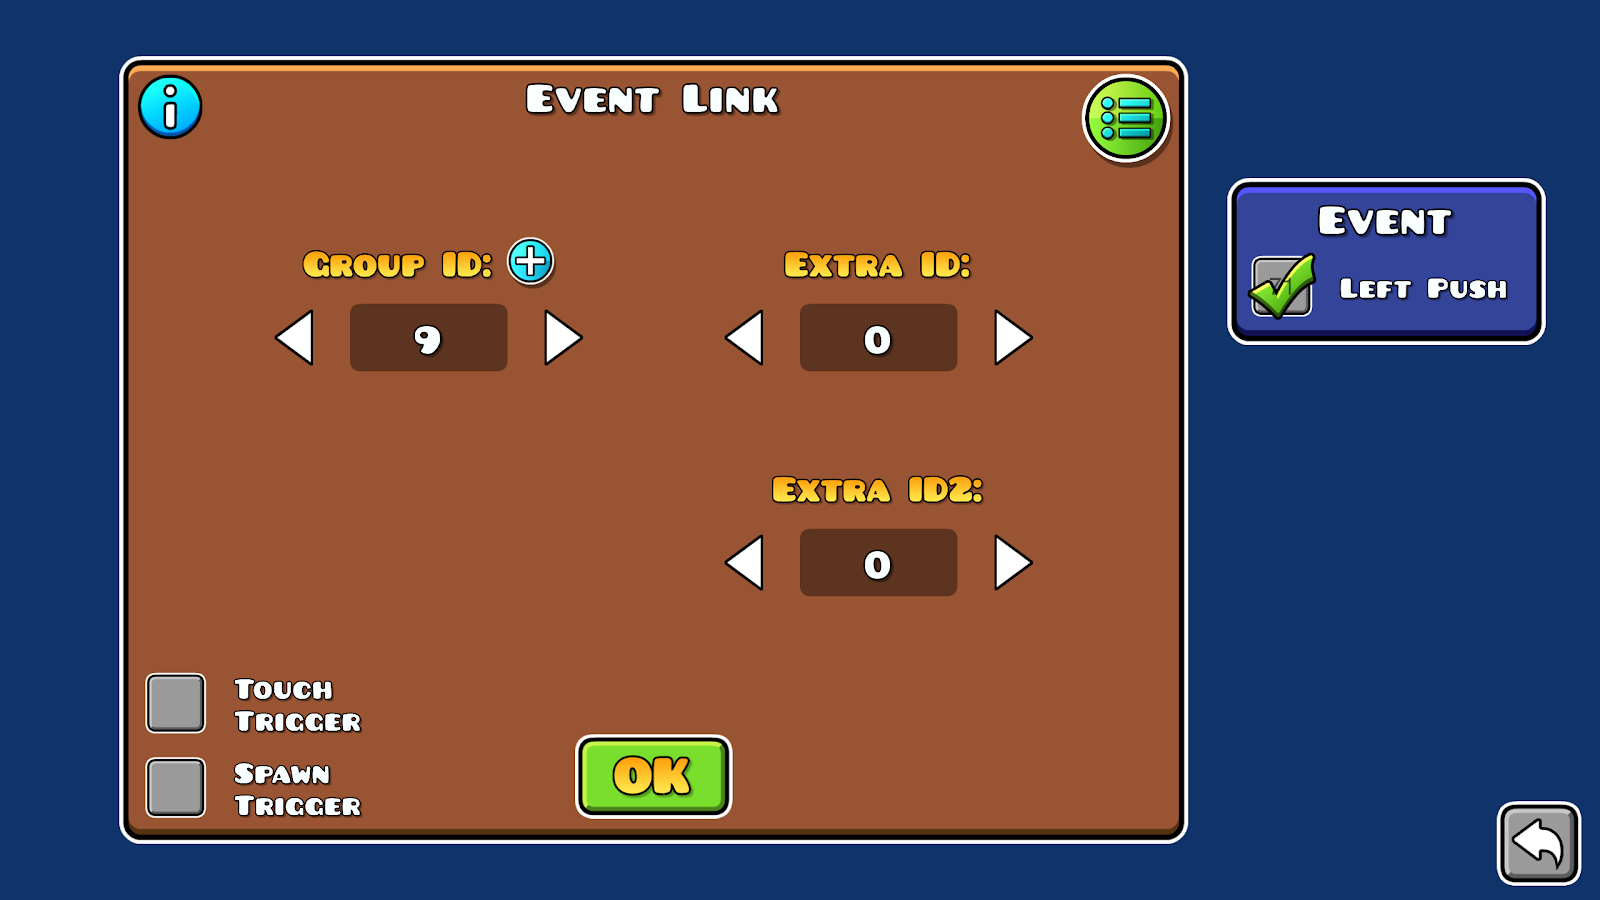
The Event and Touch trigger are the most versatile ways to detect player input, however, they function differently
| Touch Trigger | Event Trigger |
|---|---|
| detects all keys, even on classic | only detects jumps on classic |
| cannot differentiate between jump, left or right | can detect one specific action or multiple |
| is not blocked by the options trigger | is blocked by the options trigger |
Choosing between using the touch trigger or event trigger mostly comes down to your level’s gamemode; touch is more suited for classic while event is made with platformer in mind, but both can be used depending on your needs.
Toggle orb and blocks can only detect jumping, but they allow for a simpler way to activate/deactivate actions.
For example, if you want to add a “chest opening” action, you can simply place a toggle block near your chest, this means that the player will only be able to open the chest when near it, making the same action using event or touch triggers would additionally require collision blocks.
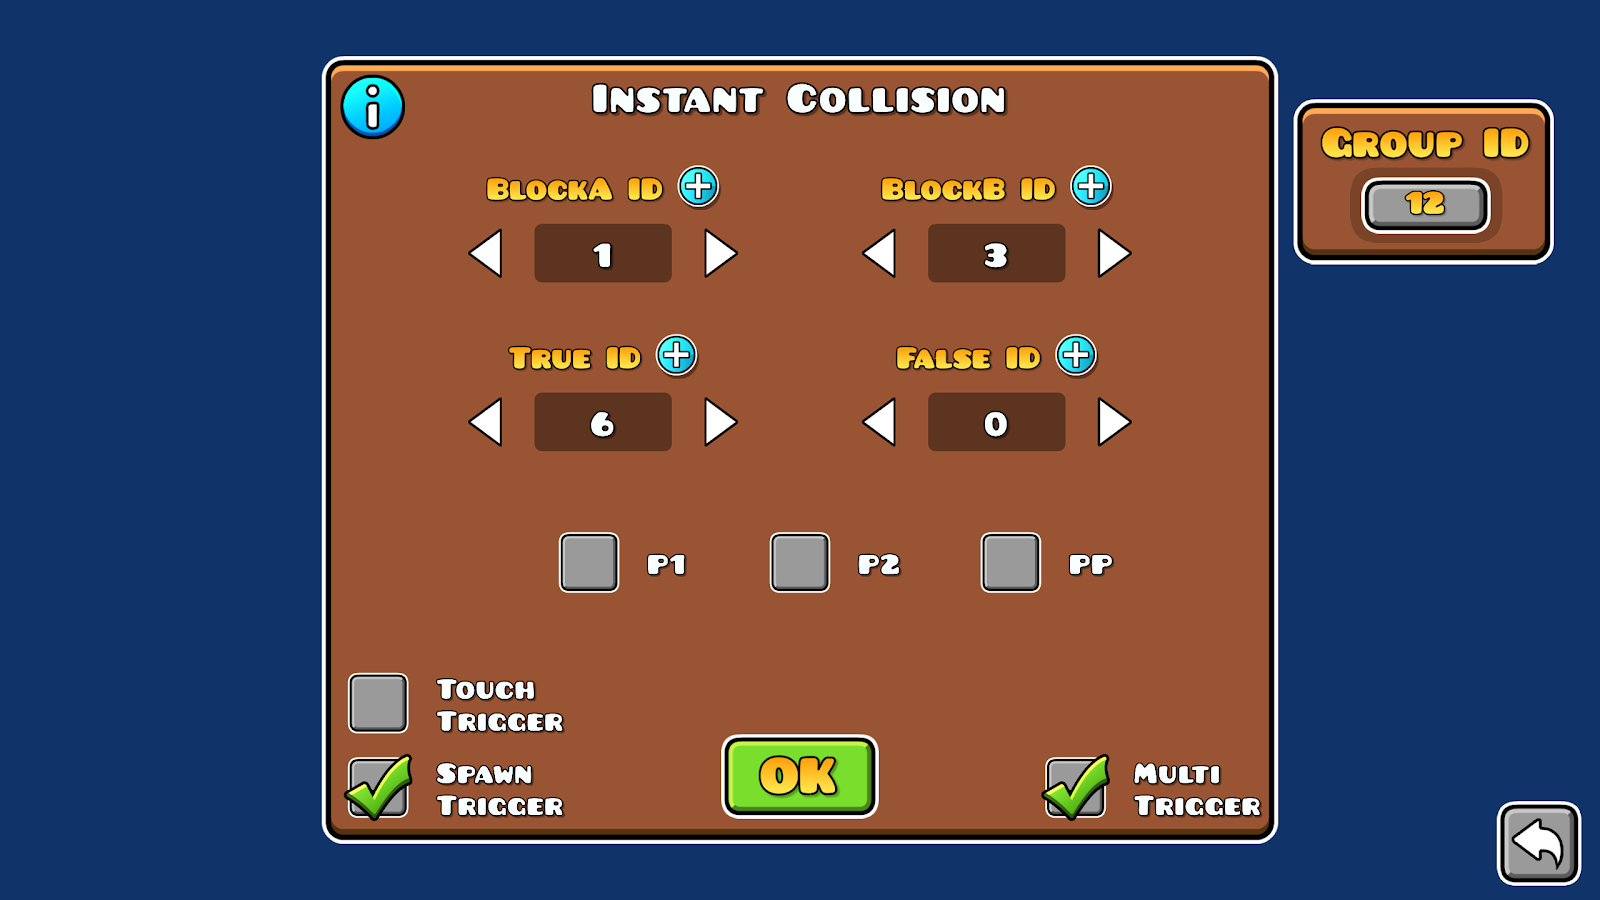
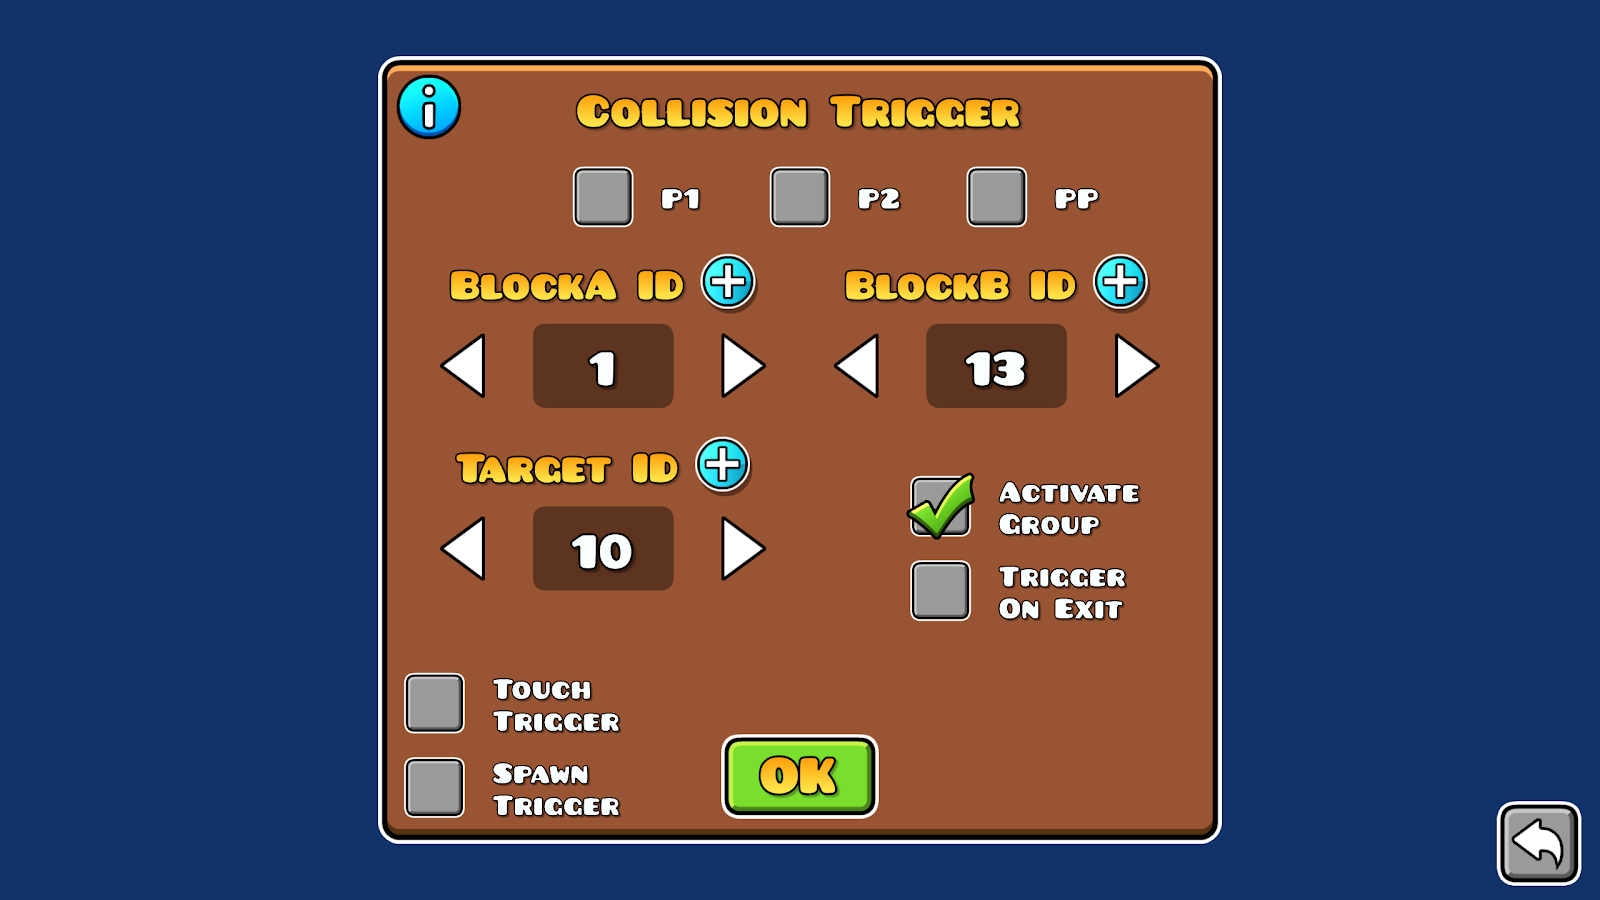
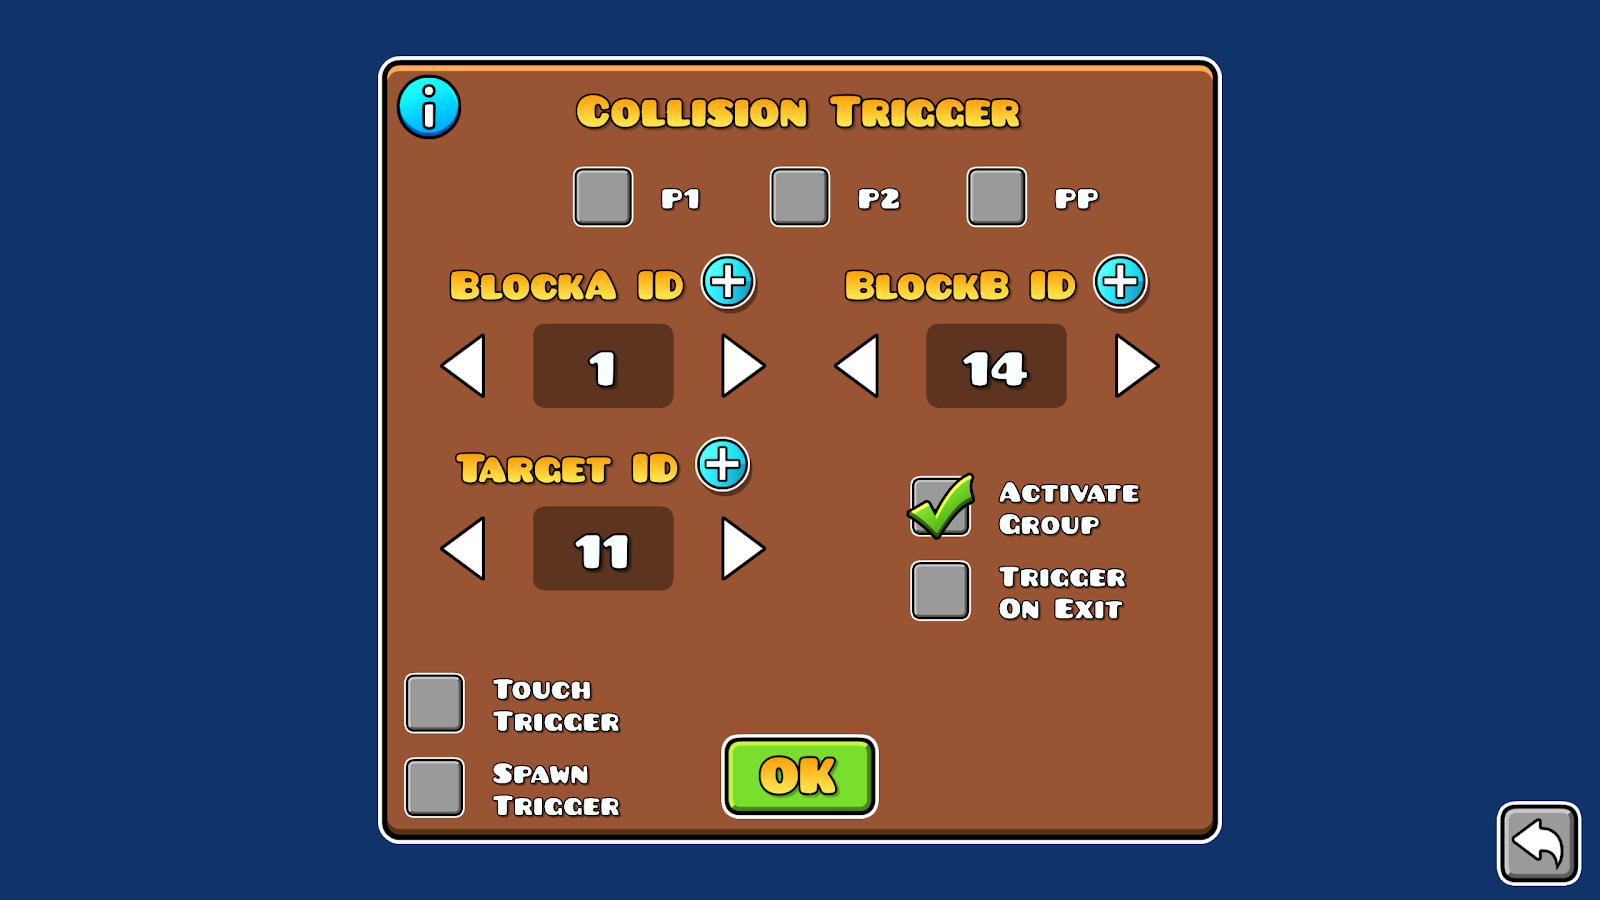
Collisions work differently than the other methods, while triggers and toggle blocks exclusively detect a player input, collisions don’t, as they only require the player to be touching them, this makes them the least reliable option of the three, so the player must be boxed to prevent any unexpected movement outside of player inputs.
One of the most popular use cases for collision is making mutually exclusive actions: the player can only go left or right, and never both
Note
It is possible to also detect collisions when the player interacts with a portal or pad using the event trigger, however this doesn’t provide any actual benefits from using collision blocks
If the normal player controls don’t fit your needs (creating a top down level for example), you might consider creating your own playable character.
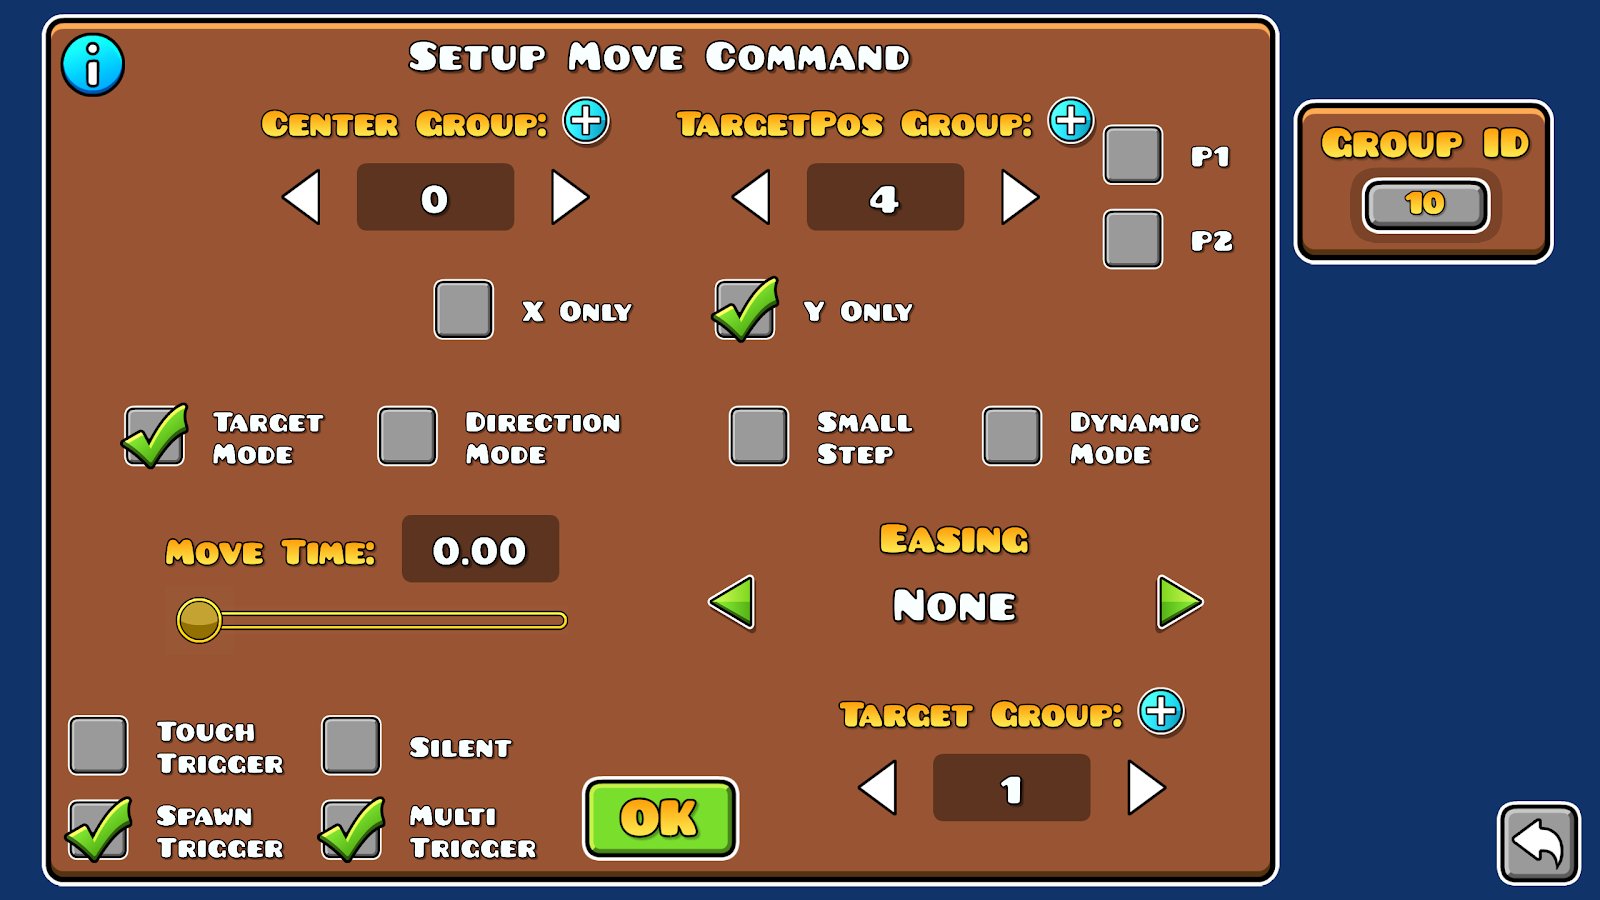
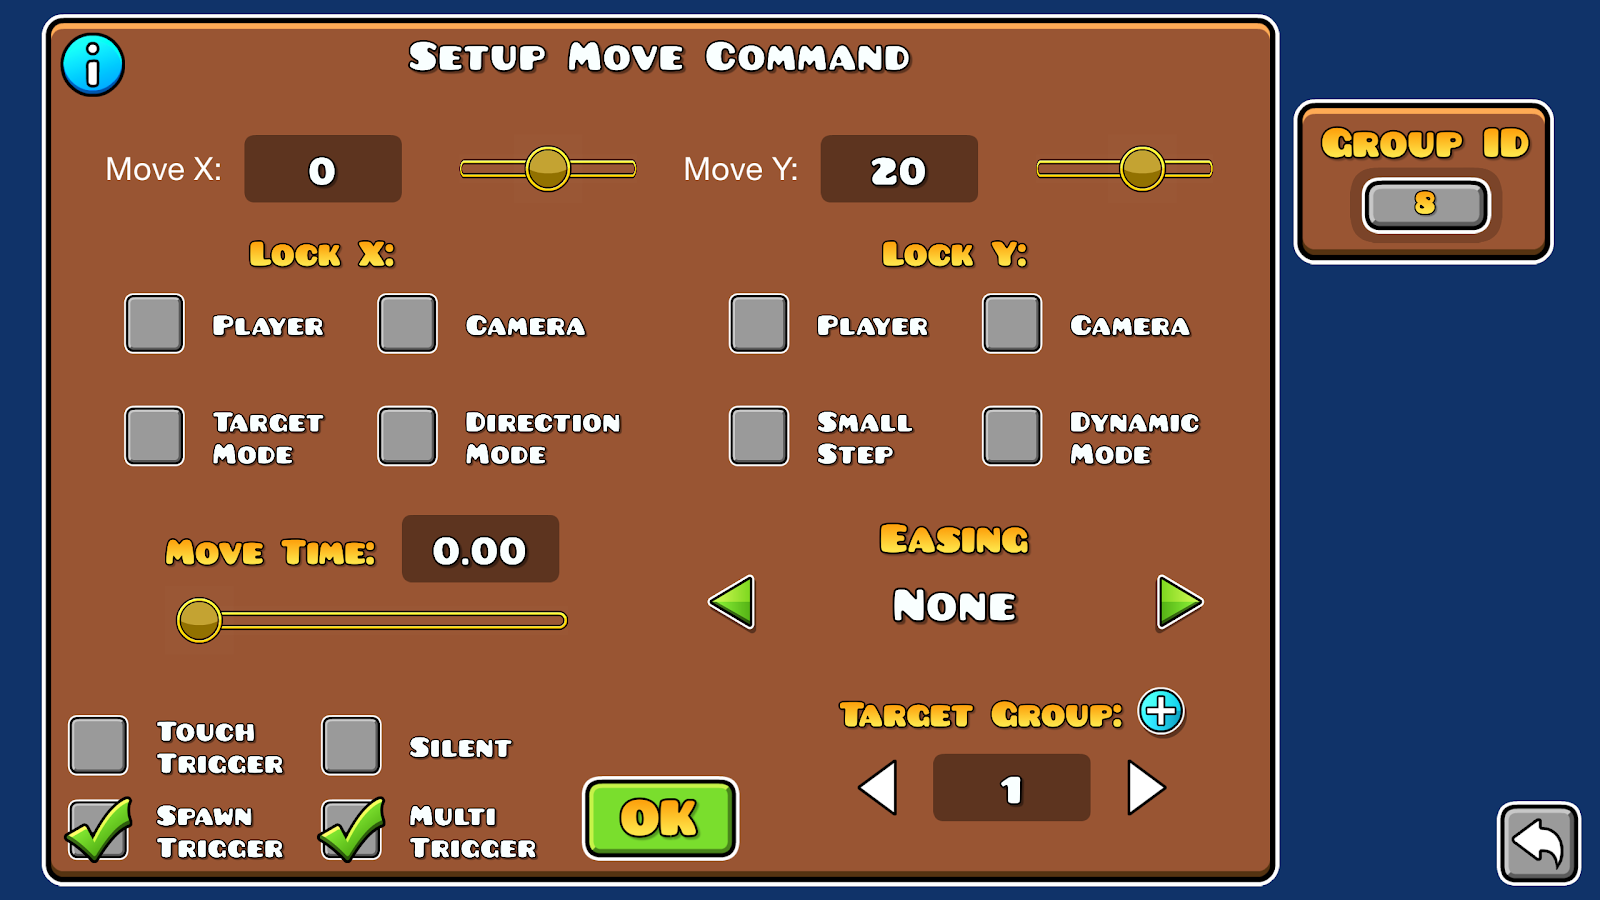
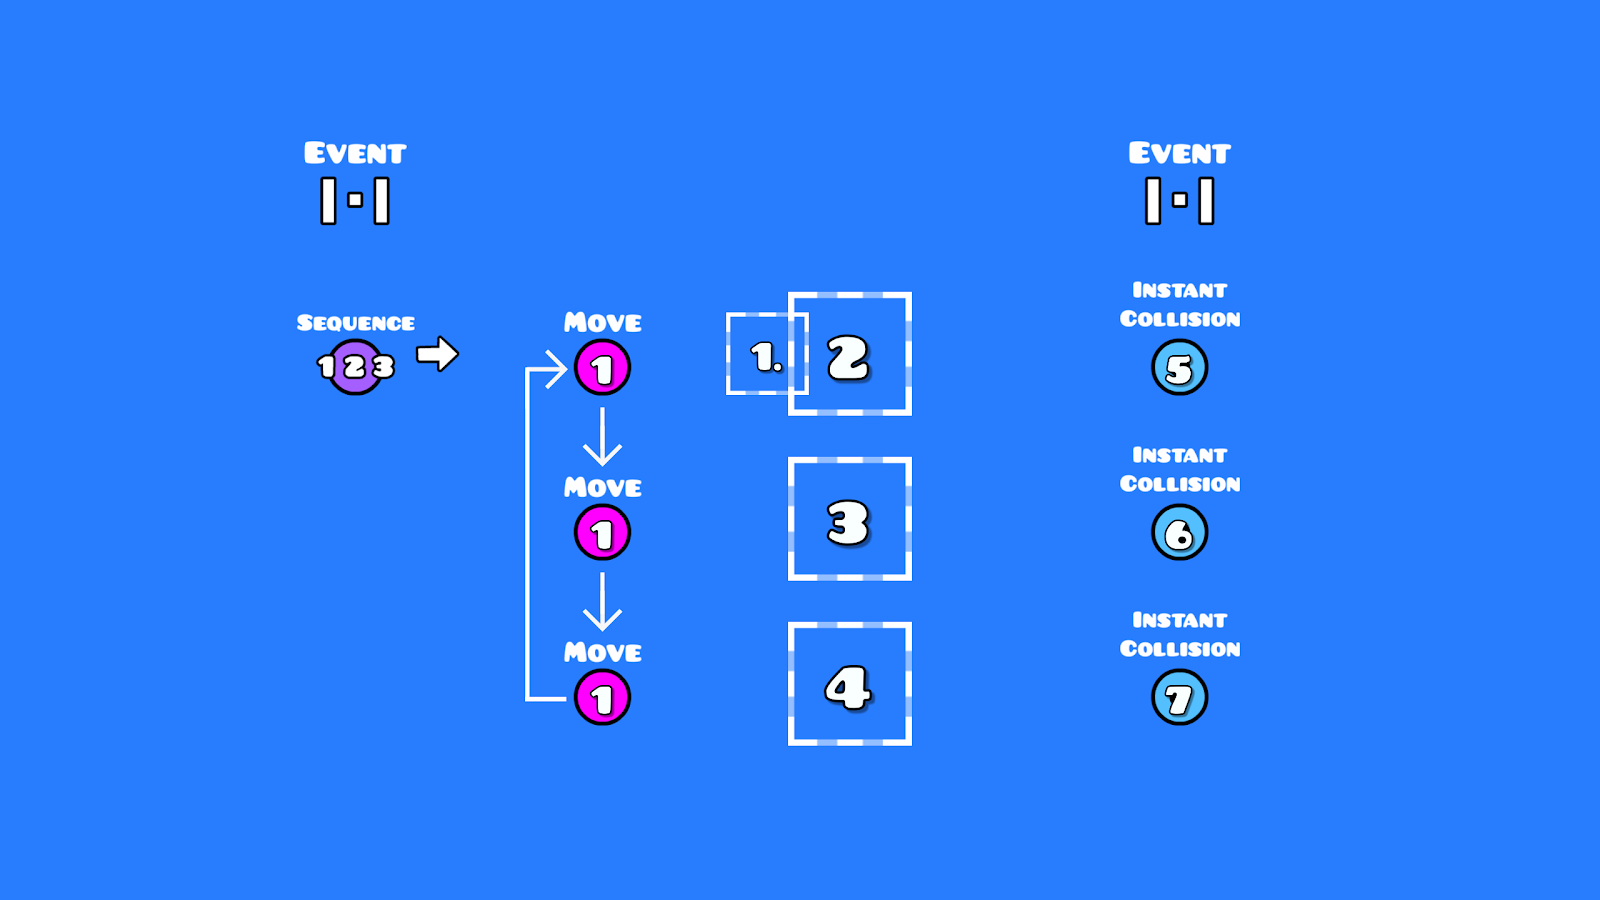
We will break this down into individual directional movements, which can be created using one of 2 trigger setups:
Note
You can also replace the move trigger with a rotate trigger.
You can combine these 2 setups to create various controls:
using setup A for each of the 4 directions (up, down, right, left) you can create a simple 8 directional movement.
However, moving 2 opposite directions at the same time can give some unexpected results, to fix this, use either of these 2 solutions:
If you want to create a top down racing game for example, you can use this setup:
With the limited number of available inputs, you may have to think differently to add more actions to your level. This section will teach you how to create useful key combinations like holding or double tapping
This trigger already has a built in hold mode, it is generally used in classic mode as it doesn’t differentiate between keys. Since this mode toggles on and off objects, it can be used with collision blocks to create a similar effects to what event triggers can do
A and B:This can be used to create actions like sprinting, or generally a stronger variation of your single tap action
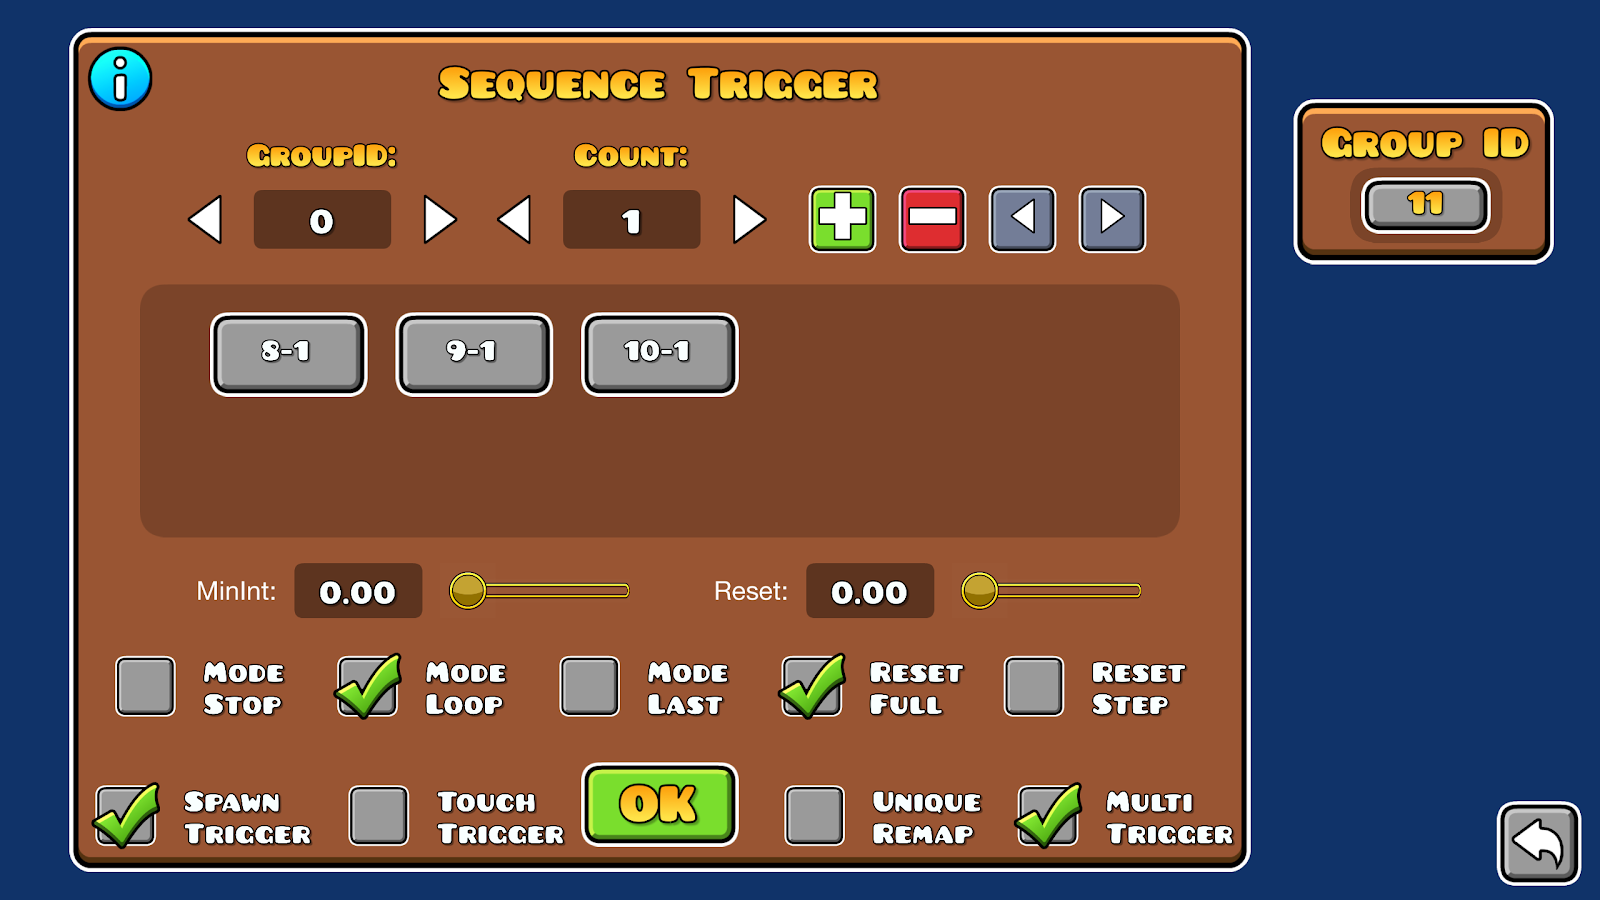
with [key] push enabledThis setup can work for any number of taps by adjusting the value in the count trigger, just make sure the delay you place on the spawn trigger gives a reasonable time for the player to perform the double tap.
Sometimes you may need multiple keys at once to be pressed
Order doesn’t matter, but the action should be done when all keys are pressed at once, the combo can either be detected when all keys are held, or when all keys are pressed in a specific time window
that detects [key] pushNote
If instead of having a small delay to press all keys you want to have the keys held all at once, you can change the spawn triggers with event triggers that detect [key] release
This is like the Shift and Ctrl keys used in computer shortcuts
that detect [mod key] push (A) and [mod key] release (B) respectivelyThis is for when you need an ordered sequence of keys to activate your action and is technically a, in this example we’ll use the following sequence: keyA -> keyB -> keyC
X that detects [keyA] push Y that detects [KeyB] pushNote
if instead of having a small delay for your key sequence you want to have keys held in a specific order, you can change the spawn triggers with event triggers that detect [key] release
Buttons require different controls from what the player icon uses, depending on your use case, you might want to implement a different approach. In the following examples that don’t use the player as a cursor, we will use a collision block, collision can be either detected using the collision trigger and toggling on and off this block, or by spawning an instant collision trigger
This is the most common way to create buttons in the level, the player can control the cursor to cycle through all available buttons. This is useful for creating menus or inventory systems. there are various ways to achieve this:
This is the simplest method to create a cursor, which is useful when creating point and click games.
Unlike the previous method, this one controls the cursor using 4 directional buttons, with additional buttons for interacting with objects.
This example creates a simple cursor, with one click button
, the first detects [key] push and activates a toggle on trigger, the second activates a toggle off trigger, this will be your clicking actionSometimes, your player controls may turn out to be unintuitive to some players.
While mobile players can change the button layout, pc players are stuck with the default keybinds as the game doesn’t support custom ones (as of 2.206). So for the moment you can implement a custom keybind system inside your level.
We’ll use the cursor system discussed in the previous section as the middle man between the input detection(touch, event trigger…) and the action; the input detection acts on the cursor collision blocks, which interact with buttons that are tied to your actions.
Now, you can add a room or menu to the start of your level where the player can change their keybinds:
Notes
The previous sections discussed what is possible to achieve using the tools you are provided in the editor, though you should keep in mind that the game has some limitations which define what can and cannot be achieved, so you may have to approach your level differently:
There are some rules you can follow to help you design a more robust control scheme:
These rules can be broken in some specific cases (fighting games sometimes include 10-key combos), this is where playtesting comes in to confirm whether or not players can quickly adapt to your controls
 .
.